Are you using Outlook in your day-to-day communication? Chances are you haven’t explored the application enough to use it at its full potential. Things you manage manually today can most likely be automated or simplified with some of the features Outlook has.
Finding these features requires a bit of digging, but we’ve collected our top Outlook hacks in this article to facilitate it for you. After reading this, I’m sure you’ll be surprised by the things you can achieve with Outlook.
1. Change View Settings
Not too keen on the way your inbox looks? You can change the view completely by accessing the different view options found under the View Tab. There are a couple of different things that can be changed, added, or removed when it comes to your Outlook layout. Let’s take a look.
Step 1: Go to the View tab

Step 2: Select Change View
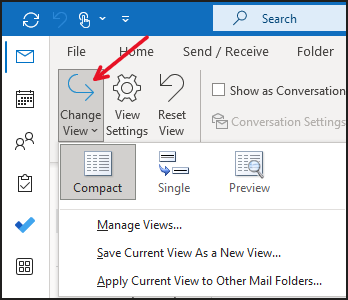
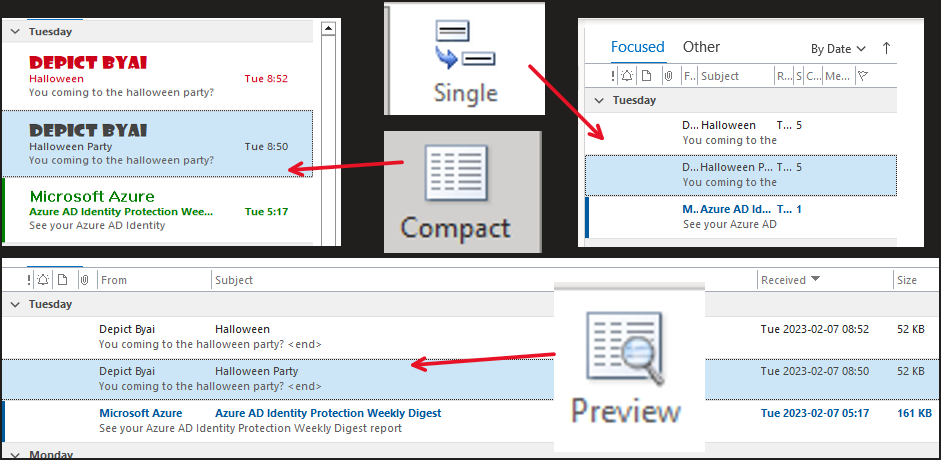
Step 3: Set the view to your liking. Down below is an image that shows you what each view looks like. The compact view doesn’t come with the horrendous fonts I’ve chosen, those are from another trick down the line.
2. Open Multiple Dates Simultaneously
When your colleague asks you if you’re available on the 13th, the 21st, the 29th, and the 4th, your usual approach would be to jump between the weeks or open the calendar in the monthly view, but those days are over.
Instead, learn to open dates that are far apart in the calendar simultaneously so you can compare them without jumping back and forth! It’s easy.
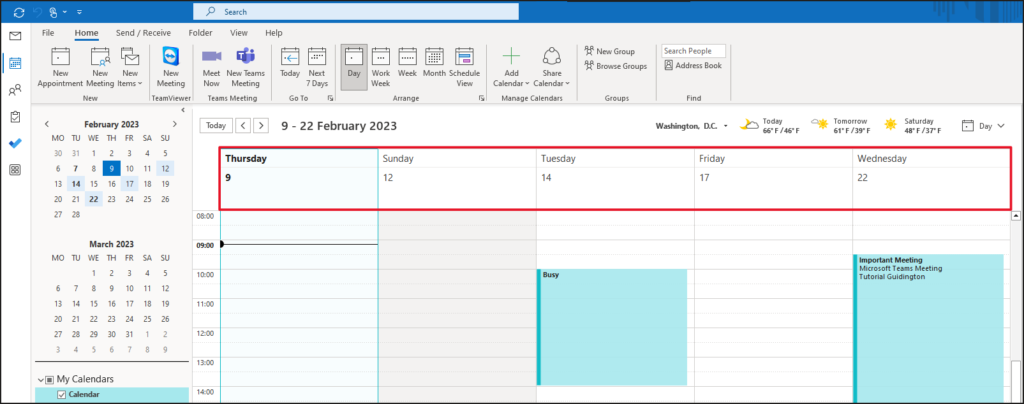
Step 1: Open the calendar
Step 2: Hold the Ctrl key and select dates on the small calendar on the left-hand side. Don’t release the ctrl key until you’ve selected all dates you want to display.
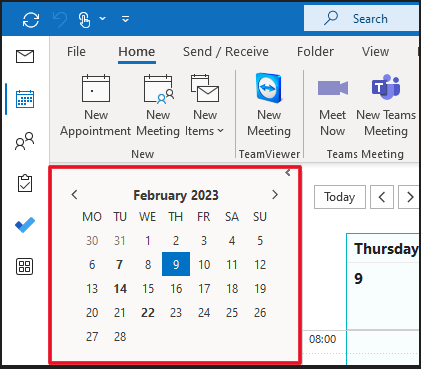
Step 3: The selected dates should now have appeared on the bigger calendar in the middle of the screen.
3. Categorize Items
Categorizing items in Outlook is a visual tool that helps you distinguish one type of booking or e-mail from the rest. Categories created in Outlook are also transferred into ToDo.
Step 1: Right-click a calendar item or an e-mail in your inbox.

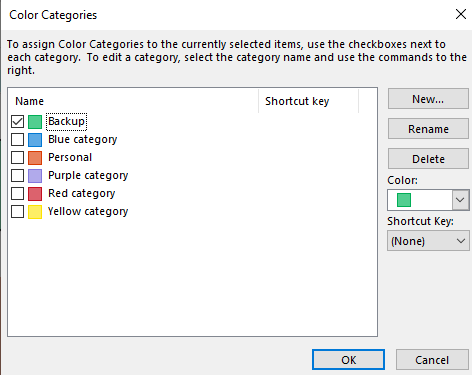
Step 2: Go to Categorize. You can now select a category for the object or manage all your categories by clicking All Categories. This includes naming them, changing color, adding more, removing some, etc. If you don’t want to manage them, then you’re done here! Otherwise, proceed to step 3.
Step 3: Create new categories, rename the current ones, and change color by selecting the category and clicking the buttons with the category checked.
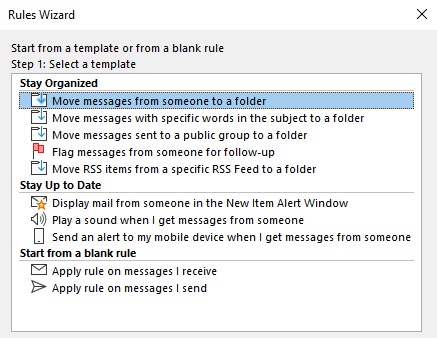
4. Create Rules To Automatically Handle E-mails
Rules in Outlook are awesome. You can automate a bunch of different things, set different triggers and make exceptions. I’ll show you a more detailed view to make all of this a bit clearer.
Step 1: On the Home tab, click Rules. If the Rules button isn’t displaying, look for the Move button as the Rules button might be hiding under it.

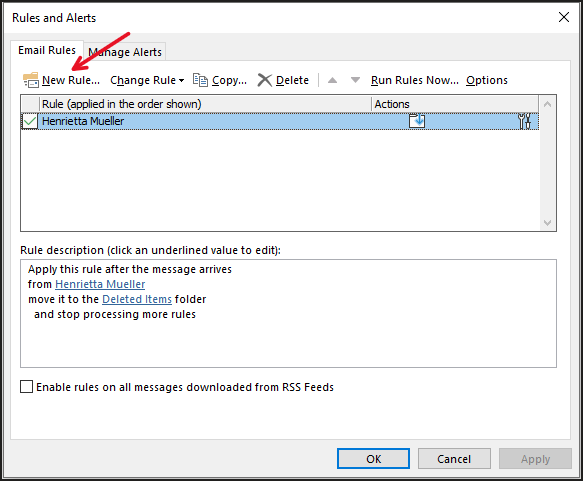
Step 2: Click Manage Rules & Alerts
Step 3: In this view, you can see your current rules. Click New Rule to create a new rule.
Step 4: You are now given some popular alternatives to pick from. If none of the rules are what you’re looking for, click Next > in the bottom-right of the window. Otherwise, select the action you want to automate and proceed to step 5.
Step 5: The blue parts of the text are the values that can be changed. In this case, Outlook is asking for us to input a sender and the folder that e-mails sent from that sender will be moved to. The values Outlook tasks for will change depending on the rule. Click the linked text to enter the values.
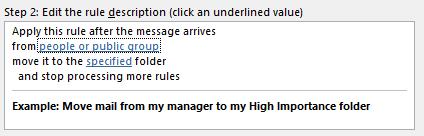
Step 6: When you’ve assigned a sender and a destination folder, click Finish. In the next window, click Apply then Ok. Your rule is now activated. The rule can be removed by going to Manage Rules & Alerts, which we accessed in step 2.
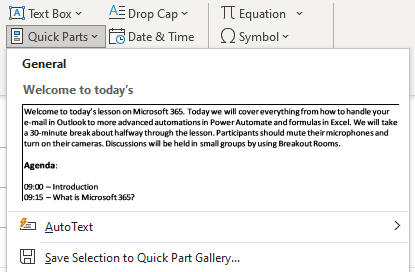
5. Use Quick Parts
Do you often send e-mails containing the same type of information? Invitations, meeting agendas, and such often have the same kind of template every time. Instead of typing them out, use Quick Parts to insert the entire section with two clicks.
Step 1: Compose the text you want to turn into an insertable Quick Part in a new e-mail.
Step 2: Select the entire text
Step 3: Go to the Insert tab and click Quick Parts

Step 4: With the entire text still selected, click Save Selection to Quick Part Gallery
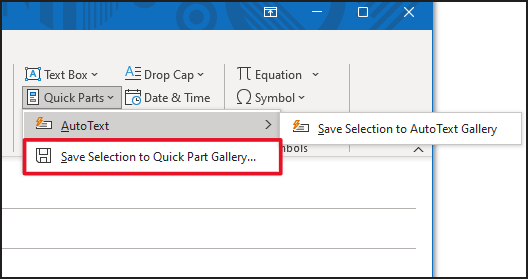
Step 5: Now, whenever you’re writing a new e-mail you can insert the entire section of text you just saved by clicking on the Quick Parts button and selecting the text.
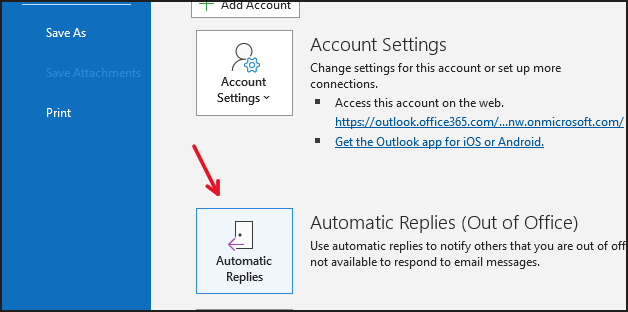
6. Create Out-Of-Office Replies
Did you know that you can create automated out-of-office replies whenever anyone e-mails you while you’re on vacation or away? It’s very simple to do!
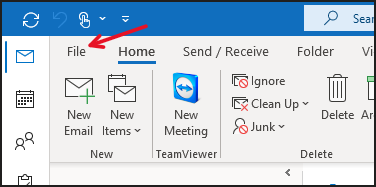
Step 1: Click File in the upper-left corner

Step 2: Click on Automatic Replies
Step 3: Enable Automatic Replies by checking the box Send automatic replies. Write the reply in the box at the bottom of the window. You can make separate replies to people within the organization and people outside it.
You can also set the time range for the automatic reply by checking the box Only send during this time range.
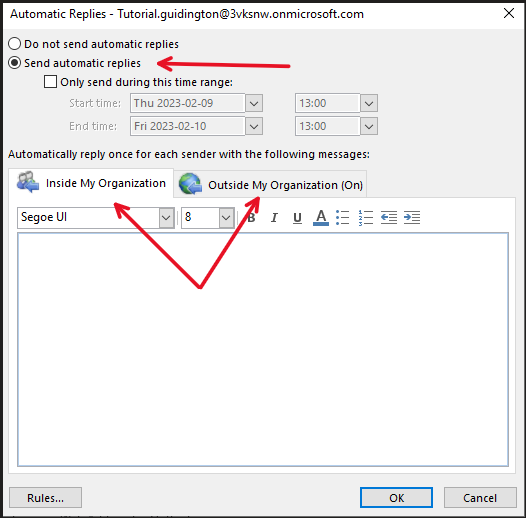
Step 4: Press Ok. Your automatic replies are now live.
7. Use Conditional Formatting
Conditional formatting can be used to make e-mails from a certain address stand out by changing the font, font size, text color, and more. You can also make e-mails with certain words in the subject line stand out.
I played around with conditional formatting a little bit and came up with this:
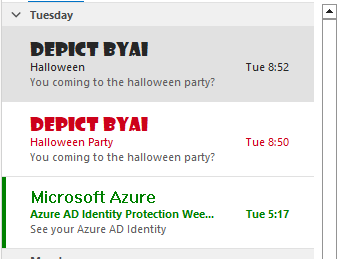
This rule changes the font, font size, and color of any e-mail containing the word Halloween. The green e-mail is controlled by another rule. Here’s how to do it!
Step 1: Go to the View tab.
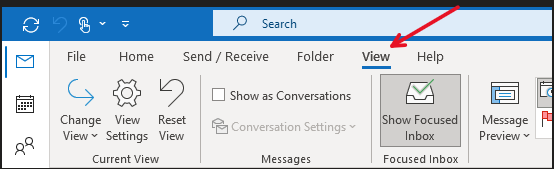
Step 2: Click View Settings.

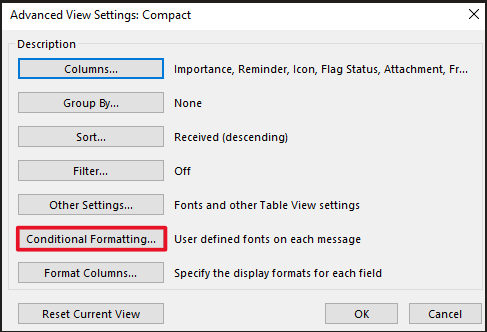
Step 3: Go to Conditional Formatting.
Step 4: Use one of the existing templates or create a new one by clicking Add.
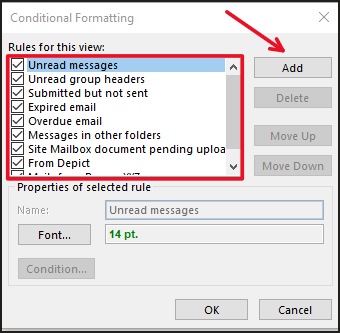
Step 5: Give the newly-added rule a name then click Font.
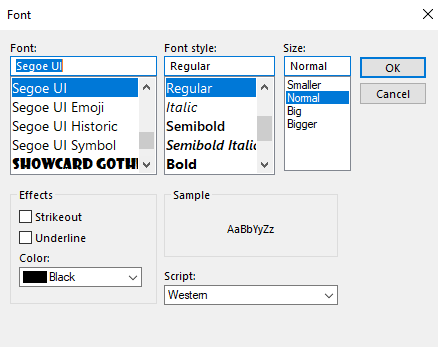
Step 6: Pick a font, font size, style, and text color then click Ok. (This is what the affected e-mails will look like in your inbox).
Step 7: Now click the Condition button which is located under the Font button.
Step 8: Set a condition for the rule. This is what will trigger an e-mail to change its appearance. If you set a person in the “From” field, any e-mail from that person will change. You can also opt for the condition to look for certain words by only filling in the words in the first field.
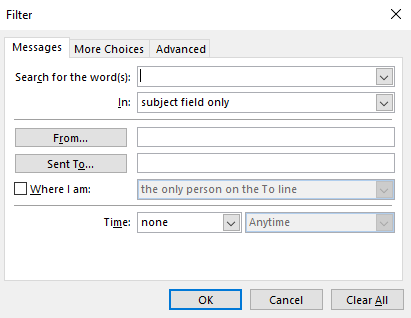
You can click the More Choices tab to find more alternatives.
8. Create Subfolders
You can structure your inbox to suit your needs better by creating folders and subfolders. Keeping an organized inbox is the easiest way to improve your workflow in Outlook. You can easily move e-mails from the inbox to other folders by dragging and dropping or creating rules that move them automatically.
Step 1: Right-click on any folder in your inbox, including the Inbox folder.
Step 2: Select New Folder to create a folder under the folder you right-clicked.
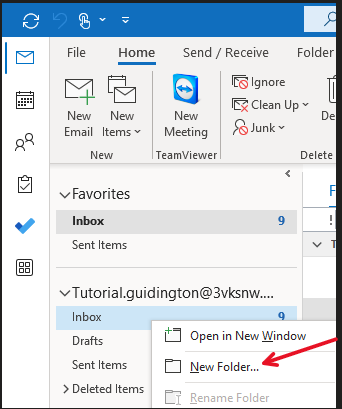
Step 3: You can now create even more folders under the newly-created folder if you’d like.
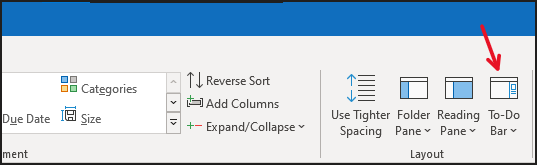
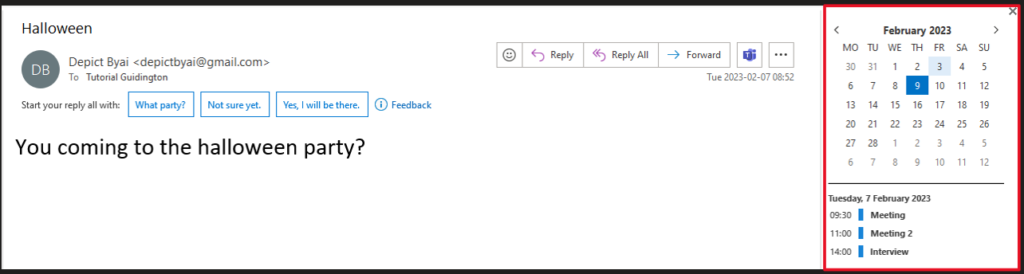
9. See Calendar While Replying To E-mail
Did you know that there’s an area on the right-hand side of the screen that can be used to display the calendar, tasks, or contacts? This panel can be seen at all times.
What’s so great about this feature is that you can display the calendar to check your availability while replying to e-mails without jumping back and forth between the calendar and your inbox.
Step 1: Go to the View tab in your inbox.

Step 2: Click the To-Do Bar icon.
Step 3: Select Calendar (or Tasks / People if you’d like to show them in the panel as well)
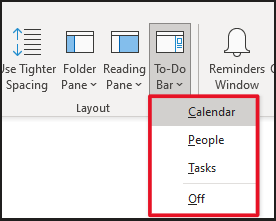
Step 4: You’ll now find the calendar on the right-hand side while replying to e-mails. Select a date to see what you’ve got planned that day.
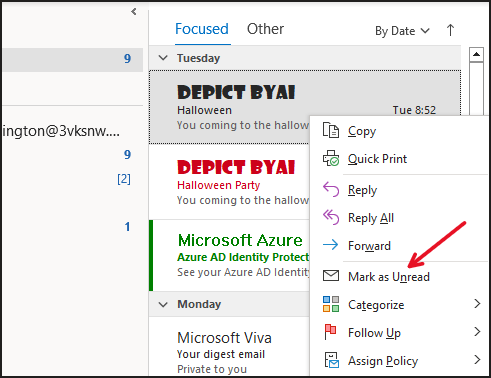
10. Mark as Unread
Have you ever accidentally read an e-mail that you intended to read and reply to later? You can mark that e-mail as unread once again, this can be helpful to remind yourself of that e-mail the next time you open Outlook.
Step 1: Right-click a read e-mail and select Mark as Unread.
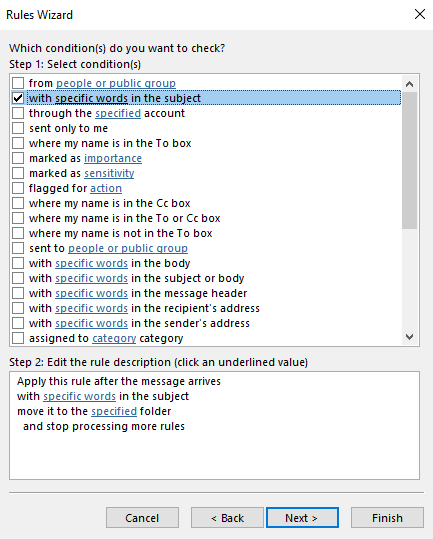
11. Remove Hundreds of E-mails With 1 Rule
Have you ever been spammed or wanted to remove a myriad of emails containing the same subject line or content? If you often invite people to meetings you might have a bunch of “Accepted” or “Declined”-emails in your inbox. This can be done with any type of e-mail.
These e-mails can be deleted automatically by creating a rule.
Step 1: Go to Manage Rules. I went over how to do it on the 4th trick. In the home tab, look for the rules button. Click it and go to Manage Rules & Alerts.
Step 2: Click New Rule.
Step 3: In this scenario, I chose to create the rule for all messages with a specific word in the subject line. You can pick any condition that suits you better.
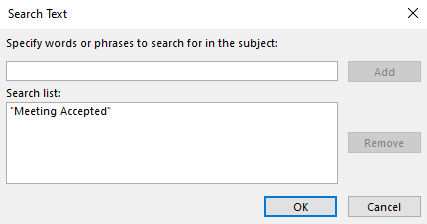
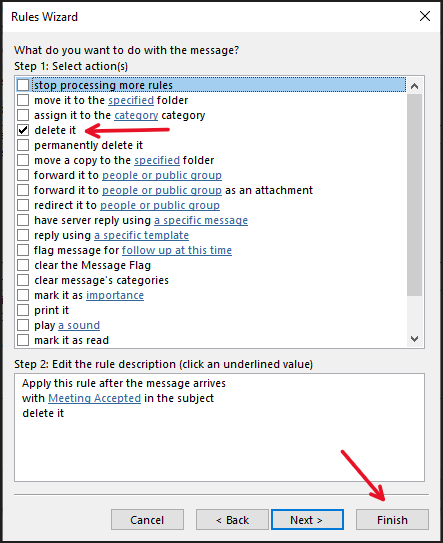
Step 4: I want to remove all e-mails where the subject line contains the words “Meeting Accepted”. Fill in the words in the upper field then press Add. Once the words/phrases are added, click Ok.
Step 5: Click Next
Step 6: Select what you want to do with the e-mails that are affected by the condition we set prior. In this case, I chose to delete them, which can be seen by the checkmark next to the option “delete it”. When you’ve checked the box, click Finish.
12. Automatically Remove E-mails Older Than X Days
Tired of manually removing old e-mails? You can have Outlook do that for you!
Over time, your inbox will start to fill up with old emails that you no longer need to keep around. Instead of removing them manually, you can make your inbox remove any object that is older than x number of days/weeks/months.
Step 1: Right-click the Inbox/Folder you want to create the automation for and go to Properties.
Step 2: Go to the AutoArchive tab.
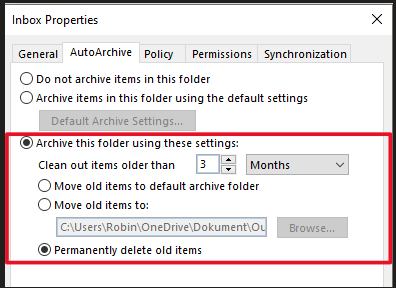
Step 3: Check the box Archive this folder using these settings and set the time limit then check the box Permanently delete old items. You can also archive items after a set amount of time if you don’t want to delete them. Archiving them places them in the Archive folder.
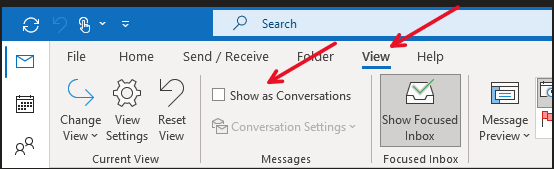
13. Show Messages as Conversations
Showing your messages as conversations will put all replies back and forth in a single string rather than as multiple messages in your inbox. This will clear up your inbox and make it easier for you to navigate it.
Step 1: Go to the View tab.
Step 2: Check the box Show Messages as Conversations.
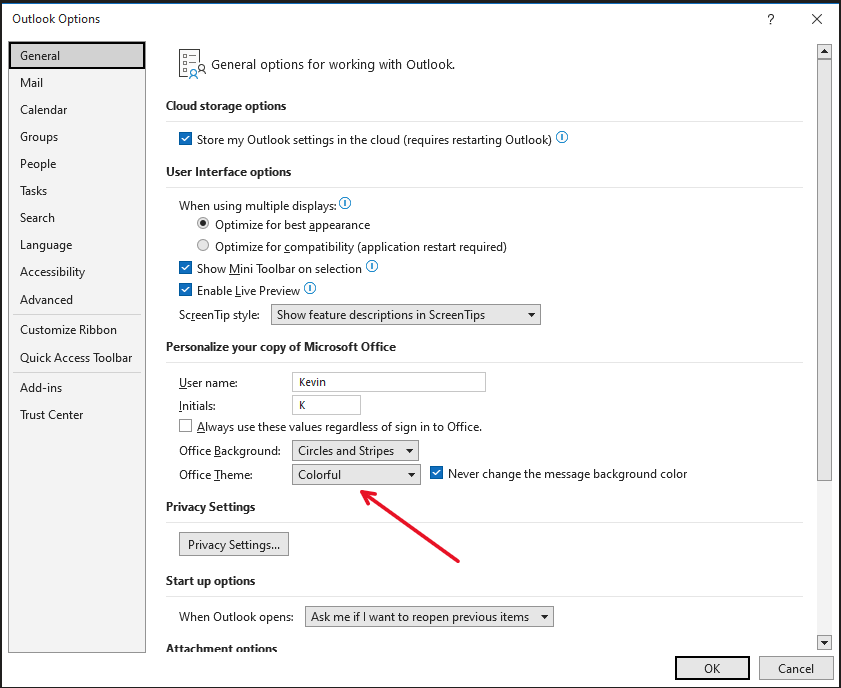
14. Change the Color Theme In Outlook
Did you know that Outlook comes in more colors than blue/white? There are plenty of color themes to pick between! I, for one, don’t like the colorful default theme because it’s too bright.
Step 1: Go to File

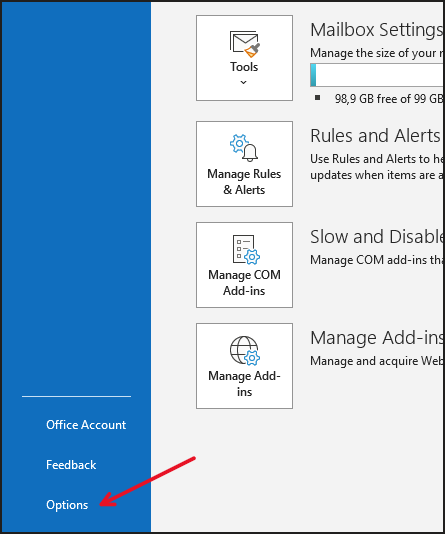
Step 2: Click Options

Step 3: Select a theme you like and click Ok.
15. Turn Outlook On the Web Into a Desktop App
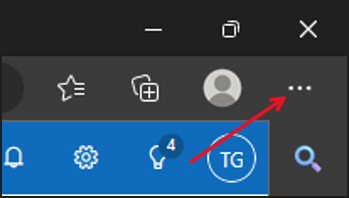
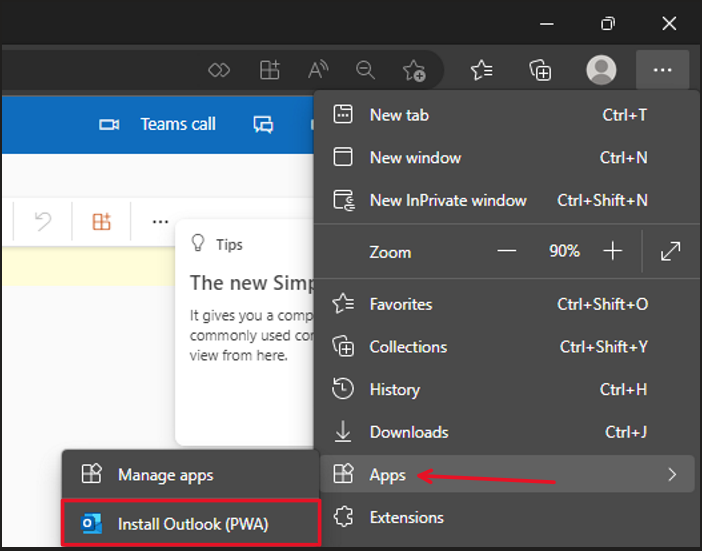
Do you read your e-mails on OWA (Outlook Web Application) rather than opening the desktop application? Well, instead of opening Outlook on the web, you can create a desktop app from the web application and maintain the same layout as the web.
Step 1: Open Outlook on the web. (www.outlook.office.com/mail)
Step 2: Click the three dots in the right corner of Microsoft Edge.
Step 3: Go to Apps and select Install Outlook (PWA).
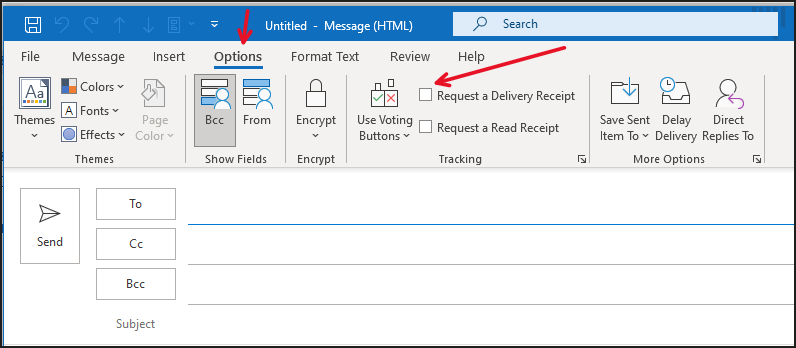
16. Request Delivery Receipts To Confirm the Mail Has Been Read
Unsure whether or not your recipient has read the messages your send? You can request read receipts and you’ll be notified once an e-mail has been opened. The recipient must agree to send the read receipt back to you, though.
Still, it’s a nice feature if you’re in a position where you need to know that everyone has paid attention to the information.
Step 1: Open and compose an e-mail.
Step 2: Go to the Options tab in the message window and check the box Request a Delivery Receipt.
17. Set Calendar Bookings as Private
Sometimes, your calendar will contain things that you don’t want your friends or colleagues to see. Labeling the booking as private will show anyone with access to your calendar that you’re busy but it won’t say what you’re doing.
Step 1: Right-click the booking in the calendar and select Private. Your booking is now private. If you would like to remove the private tag, right-click the booking and click Private again.

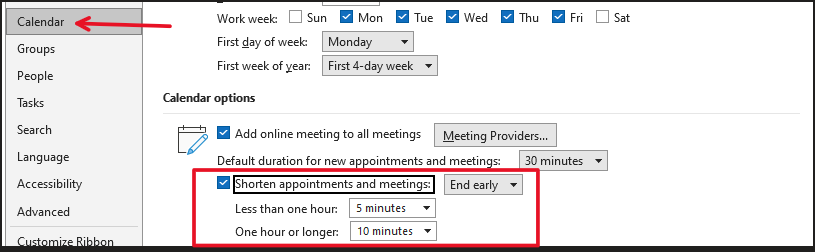
18. Shorten Appointments and Meeting Automatically
When we had to adapt to working from home and having all of our meetings on Teams or Zoom, the space between meetings was practically removed. Instead of transporting yourself from one location to another for a physical meeting, you could now leave one meeting to join the next in seconds.
While this might be practical, it leaves no time to reflect and catch your breath. Instead, I’ve set my meetings to automatically remove 5 minutes from the meeting time in order for me to stretch my legs, get a glass of water and prepare myself for the next meeting.
Step 1: Go to File in the upper-left corner.
Step 2: Go to Options.
Step 3: Go to Calendar and check the box Shorten appointments and meetings. You can set them to end early and then decide how much earlier depending on the length of the meeting.
19. Change the Calendar Color
Don’t like the color of your meetings and other bookings in the calendar? You can change the color of your calendar. While the color options are somewhat limited, I’m sure there’s something for everyone.
Step 1: Go to your calendar and open the View tab then press Color.
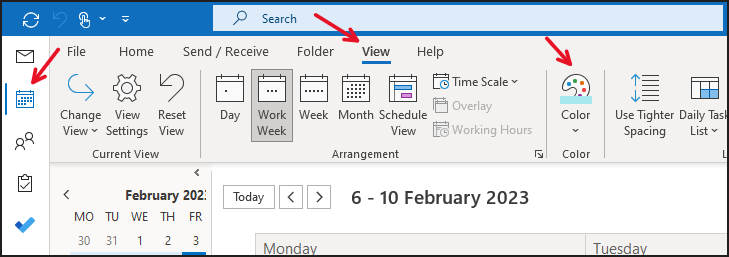
Step 2: Select the color of your choice. The default color of your calendar will now change.
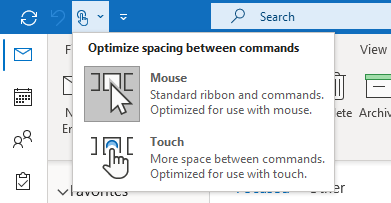
20. Activate Touch Mode
Because of how many buttons there are on Outlook’s upper panel, browsing it with a touch device can be a bit difficult. Therefore, Microsoft has implemented touch mode.
With touch mode activated, the space between each button will be increased to prevent the user from clicking the wrong button.
Step 1: Click the little icon in the upper-left corner of Outlook and select Touch to enable touch mode.