
Using a multimonitor setup when gaming is incredibly convenient because you can use your primary monitor to play games while watching media or reading something on your second monitor.
However, a lot of users have noticed that their second monitor goes completely black while playing on their primary monitor. This somewhat defeats the purpose of having a second monitor for a lot of people.
There are multiple things you can do to fix this issue. First of all, do a clean reinstall of your GPU drivers, and don’t use the Windows device manager for this. Secondly, make sure that you update Windows to its latest version. There are more things you can do to solve this issue, but these two are arguably the most important.
There are more potential solutions for this issue. Before reading on, make sure that power is connected to your monitor and make sure that all of the cables are securely connected. Keep reading to find out more solutions to this issue.
1. Manually Select the Monitor Source
While almost all monitors automatically detect the type of video source that is connected to a monitor, some monitors simply don’t. That’s why you have to make sure that the correct source is selected.
Most monitors will allow you to do this through a button on the bottom of the screen. Most monitors use HDMI or DP these days. Select the proper source output for your screen, then see if your monitor is working.
In some rare cases, you’ll even have to do this after starting a game. When the screen goes black, see if you can manually select its source and see if it starts working.
2. Update Your GPU Drivers
Arguably the most important thing of all is to make sure that you have up-to-date GPU drivers. The drivers are what allow your graphics card to communicate with your operating system, and if you have outdated or faulty drivers, this can cause a large range of issues.
You should always have up-to-date GPU drivers. I strongly recommend downloading your GPU drivers from the GPU manufacturer’s website rather than doing this through the device manager in Windows.
If you update or reinstall drivers through Windows, the only thing that is deleted is the address to the driver files, but links and other file extension associations are still there. Instead, you should reinstall drivers through DDU, which will clean up all traces of previous drivers for you.
If you want to follow the proper method of downloading and installing new GPU drivers, follow the steps below.
- First, download DDU here
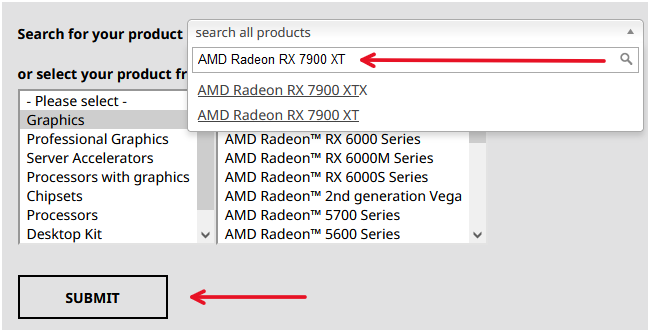
- For AMD GPUs, search for your specific GPU in the dropdown box on the website, then download the driver for your operating system and put it on the desktop
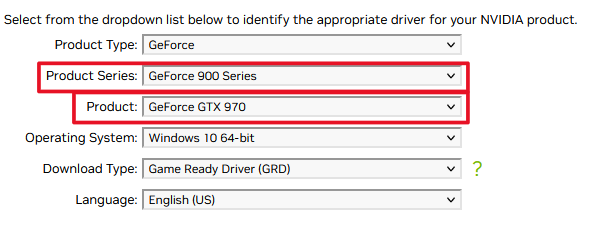
- For Nvidia GPUs, select your product series and product in the dropdown lists, then click on Search
- Click download and then put the driver file on your desktop
From here, you can either run the driver file you have downloaded and install it to see if it works immediately, or uninstall your previous drivers with DDU first. I personally recommend using DDU for this to make sure that there aren’t any existing interferences with previous drivers.
If you want to learn how to use DDU to uninstall drivers, follow the steps below.
- First, you need to disconnect the internet. If you have an ethernet cable, pull it out. This is to prevent your computer from automatically installing new drivers when you’ve uninstalled your old ones
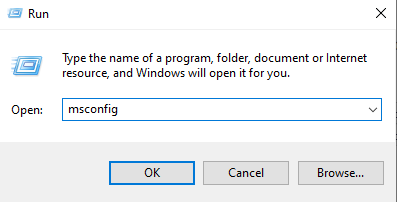
- Press the Windows key + R at the same time, then type msconfig and hit Enter
- Under Boot options in msconfig, select Safe Mode
- Restart your computer
- Run DDU as an administrator (right-click it and select Run as administrator)
- Close the pop-up window in DDU
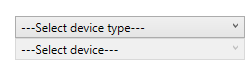
- Select your device type and device on the right-hand side
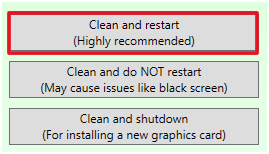
- On the left side of the window, select Clean and restart
- When the PC has restarted, run the driver file on your desktop
- To delete the safe mode boot, simply repeat the process of going into msconfig and unchecking the safe boot box
3. Configure the Nvidia Control Panel
You might be required to manually set up your two monitor setup using the Nvidia control panel. This has been shown to help users solve their black screen issues.
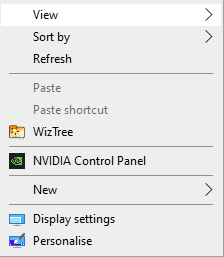
Of course, this requires you to have the Nvidia control panel installed. To check this, right-click your desktop and see if there’s an NVIDIA Control Panel option.
If you for some reason don’t have the Nvidia control panel installed, reinstall your drivers first, as the control panel comes with all new driver installations.
After going into the control panel, look to the left side of the screen. Under Display, look for Set up multiple displays and click that option. Here, make sure that both of your screens are connected to your dedicated graphics card as opposed to the internal one.
4. Match Cables
Sometimes when you use two monitors, you simply use the cables that are available at home. This can cause issues depending on the cables you have connected.
For example, if you’re using an HDMI 2.0 for your primary 144Hz+ monitor and an HDMI 1.0 for your secondary monitor, the secondary monitor might not work.
That’s why I recommend using the same cable for both screens. Borrow one or use one from another device to see if that fixes your issue first. If it does, you can buy a new HDMI 2.0.
In my experience, DP cables work fine with both HDMI 1 and 2 but it can’t hurt to try out different cables if that’s what you’re using for one of your monitors.
While you’re tinkering with cables, check for any type of damage to them and make sure that they’re properly seated in their slots.
5. Change the Scaling to Full Screen
The Nvidia control panel has a lot of options available to configure your monitors. Monitor scaling options in the Nvidia control panel are handy to change the display scaling on your monitor.
There are two different options to choose from, Full-screen and Aspect ratio. Many users have found that changing the scaling option from aspect ratio to full-screen has solved the issue with their second monitors.
Sometimes, games fail to recognize the aspect ratio of the second screen while you’re in-game, and as a result, the second screen goes black. If this is why it’s happening to you, you can solve it easily by changing the scaling mode to full-screen instead.
Follow the steps below to do this.
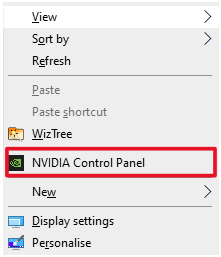
- Right-click your desktop and select NVIDIA Control Panel
- After this, go into Adjust desktop size and position under Display
- Change it to Full-screen if Aspect ratio is enabled
- Click Apply at the bottom-right of the window

6. Update Windows
Windows updates include everything from operating system improvements to bug and compatibility fixes. If your second screen isn’t working, you should make sure that you have Windows updated to the latest version.
There’s certainly a possibility that you have a Windows version that has a bug in it, that makes your second screen go black when gaming.
Therefore, you should update your Windows OS to the latest version. Luckily, this is very easy to do. Simply follow the steps below.
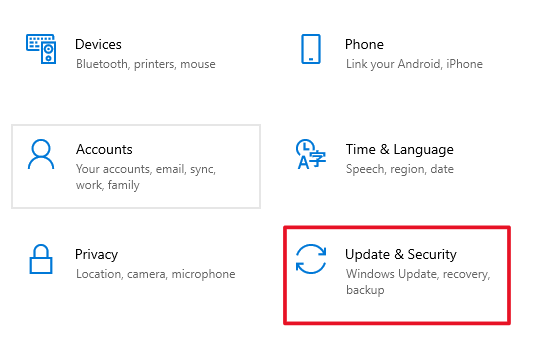
- Press the Windows button + I
- Head to Update & Security
- At the top of the new window, click on Check for updates
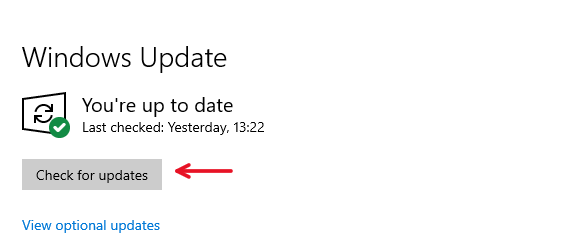
- If there are any updates available, follow the steps and download the new Windows patch
7. Manually Reset the Monitor
A lot of monitors have options that allow you to factory reset them. This may allow you to clear any settings that make your monitor go black.
It’s hard to say exactly where you have to click to factory reset your monitor since all monitors have different options for it. Check your user’s manual or the monitor manufacturer’s website to find out how to go about it.
8. Don’t User the Power Saver Mode
Power saver mode is a useful option in Windows to save power. However, having this option turned on can give you some performance issues when playing games, especially when having two screens.
Your GPU needs to render more pixels on your screens, causing it to have to work more. If it can’t handle this, your second monitor might shut down to prevent further issues.
If you have the power saver mode enabled and your second screen is going black, you should turn it off to fix this.
- Press the Windows button + X
- Head into Power Options
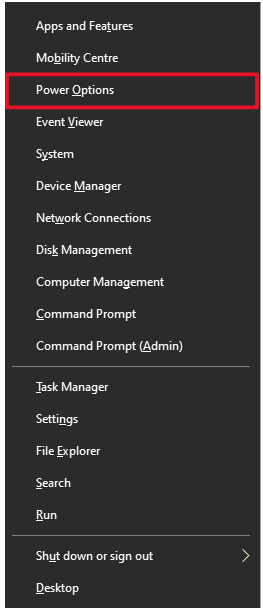
- Click Additional power settings
- Select another profile than Power saver