Keyboards are the quintessential tool for using a computer, and without them working, the computer isn’t going to be good for much.
Unfortunately, users report that their keyboards sometimes stop working for no apparent reason in Windows, which means that a big majority of the computer’s functions are now rendered useless until the problem is solved.
That’s why I’ve listed the X most common reasons and solutions why keyboards sometimes randomly stop typing. After reading this in full, you can go back to typing on your keyboard as normal again.
The most common reason why your keyboard randomly stops typing sometimes is because of the drivers of the device. Updated and working drivers are important to all devices connected to your computer, and you should update them. Simply head to the device manager, right-click the keyboard in question, and select update drivers.
Faulty or outdated drivers are probably the most common reason, but of course, there can be other reasons why your keyboard stops working randomly. Keep reading to find out more.
Before we get started, I would recommend that you first try to connect another keyboard to see if the issue still occurs. This way, you can determine if the problem lies inherently with your keyboard or if it’s some issue within your computer.
How To Turn On The Virtual Keyboard
Many of the fixes below demand that you perform different tasks within Windows, which might be hard if you don’t have a working keyboard. Therefore, you should enable the virtual keyboard in Windows. To do this, follow the steps below.
- Press the Windows key + I to access the settings menu
- In this menu, select Ease of Access
- In the Ease of Access menu, scroll down and click on Keyboard on the left-hand side

- Check the On-screen Keyboard alternative at the top of the new window

1. Update Or Reinstall Keyboard Drivers
As I briefly mentioned before, drivers are important to all devices on your computer to be able to work properly. With outdated or faulty drivers, your keyboard won’t work as it should.
That’s why you should try to update them. If your computer prompts you that the latest updates are already installed, then you should try reinstalling them instead.
Both methods work in the same way, except that you have to restart your computer after you have uninstalled the drivers. When you restart the computer, it will automatically reinstall the drivers for your keyboard.
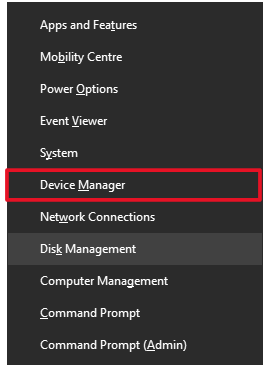
- Press the Windows key + X and then select Device Manager
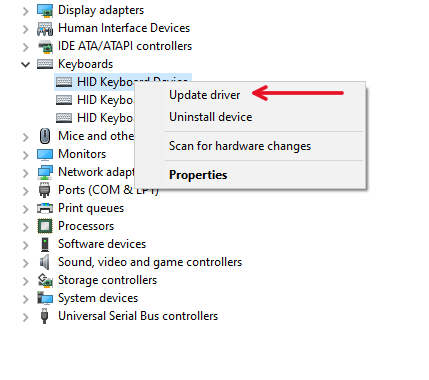
- In the Device Manager, look for Keyboard and double-click it to bring up the different keyboard devices
- Right-click the keyboard option that you want to update, then select Update driver
As I mentioned before, if this doesn’t work, simply do the same thing but instead select Uninstall driver. Then, restart your computer.
2. Clean Your Keyboard
Cleaning your keyboard from time to time is a good idea since the space behind the keys can get filled with all sorts of stuff. This stuff can hinder the keys from being pressed down properly, and as a result, hinder the keyboard from working.
The easiest way to do this is to buy some compressed air and clean it that way. Remember, don’t do this inside if you want to avoid getting the room showered in dust and other unpleasant materials. Instead, go outside and do it.
This is especially important if you have a mechanical keyboard. There is a lot of space behind the keys in mechanical keyboards and the importance of cleaning can’t be understated.
3. Try Using Another USB Port
Sometimes, the USB port where you insert the keyboard cable can be faulty itself. That’s why you should try switching the ports for your keyboard to see if this fixes the issue.
Furthermore, some USB ports are for charging and some are for data. If you have the keyboard connected to the wrong one, it can cause some issues.
If you have recently switched USB ports, I would recommend trying with its original port again.
4. Run Windows’ Troubleshooter
Window’s default troubleshooter is no miracle worker, that’s one thing that’s for certain. However, it can help with detecting and fixing settings and other things that otherwise would be difficult to fix or even notice.
That’s why you should try running it. To do this, follow the steps below.
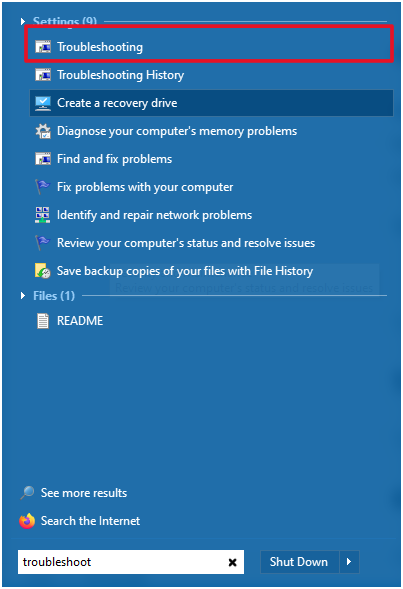
- In the Windows search bar, type Troubleshoot and click on the icon
- In the new window, select Hardware and Sound
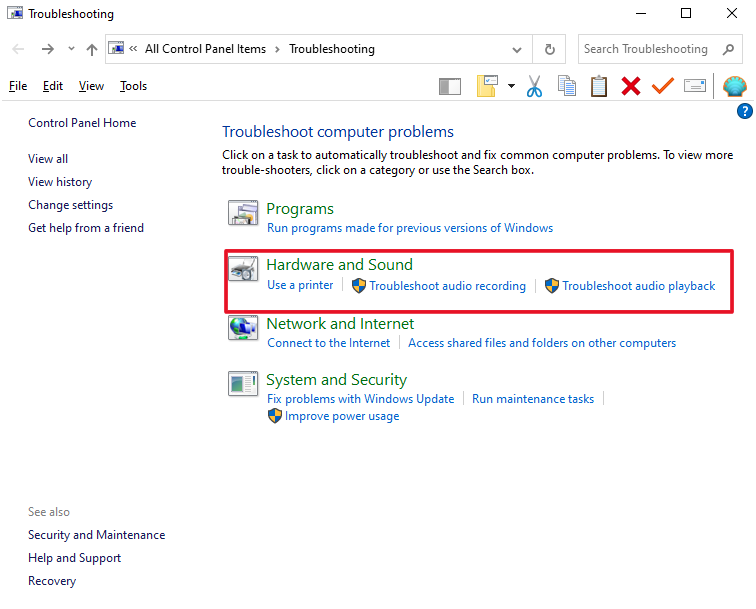
- Select Keyboard at the bottom of the Hardware and Sound menu
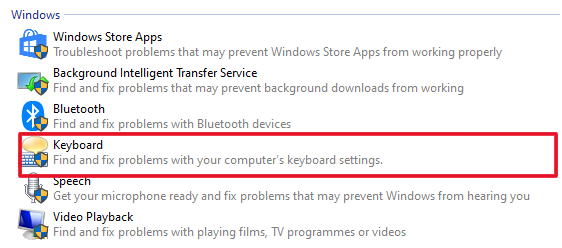
After this, simply follow the steps and click Next when it’s prompted on the screen. Have patience and let Windows do its thing.
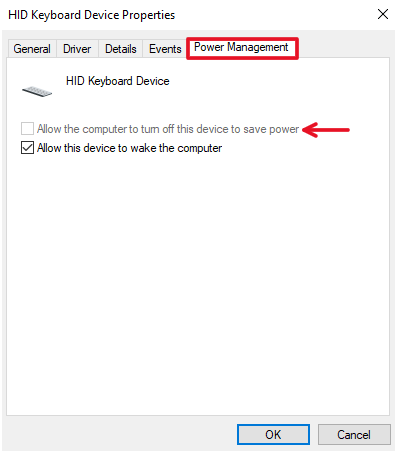
5. Change Power Management Settings
To save power, Windows have some option enabled by default if you’re running one of the standard power plans. One of these options is to automatically disable some USB functions when they’re not used.
Sometimes this causes devices not to work when they’re woken up after a pause, and that’s why you should try disabling this option. Follow the steps below.
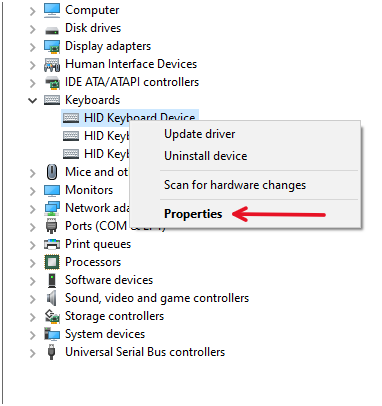
- Press the Windows key + X and then select Device Manager
- In the Device Manager, look for Keyboard and double-click it to bring up the different keyboard devices
- Select Properties
- Select the Power Management tab and then uncheck the Allow the computer to turn off this device to save power option
6. If Wireless: Change Batteries
If you’re using a wireless keyboard, then a malfunctioning or drained battery will cause your keyboard to seem stuttery and unresponsive until it finally stops responding at all.
Whether you’re using a keyboard with something like a lithium-ion battery that is rechargeable, or just regular AAA batteries, the solution is similar. Switch out the batteries if you’re using AAA, and charge the battery in your keyboard if you’re using a chargeable keyboard.
If charging the keyboard doesn’t work, you will have to contact the manufacturer or possibly return it.
7. Update Windows
Updating Windows is important for the purposes of user experience, but also for fixing software and hardware bugs. If you haven’t updated your Windows operating system in a while, it’s probably time to do so.
First, you should simply check for updates. If there are any available, I strongly recommend that you install them. To check for updates, follow the steps below.
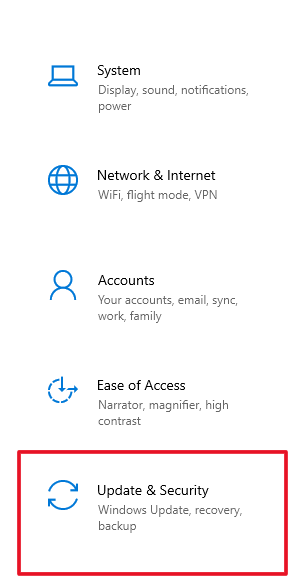
- Press the Windows key + I to access the Settings menu
- Select Update & Security
- At the top of this new menu, click on Check for updates
- Just under the Check for updates button, also check for feature updates
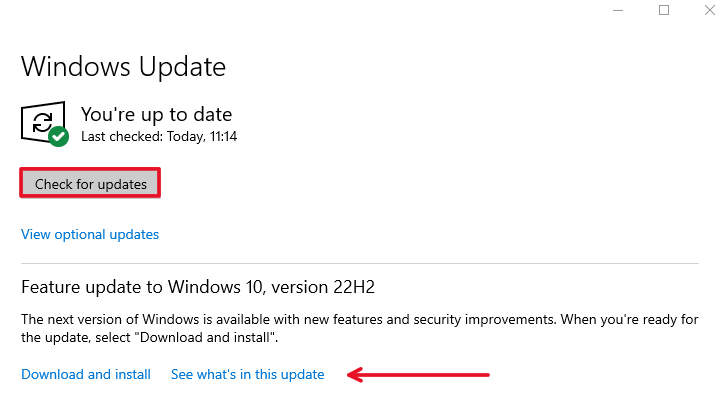
If there are any updates, let them install and then restart your computer. Now, see if your keyboard works better.
8. Disable Sticky and Filter Keys
There are two keypress options in Windows that you (probably) don’t want to be enabled. These two are sticky keys, which makes typing in quick succession an impossibility, and the filter keys option, which stops the same key from being pressed twice or more in a quick manner.
Now, these options can be useful for some people, but they’re also easy to accidentally press down. To disable these options, follow the steps below.
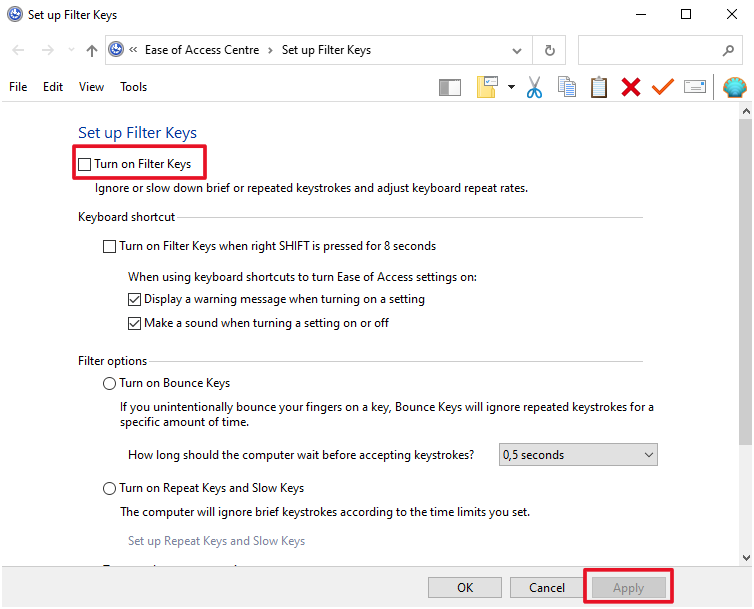
- Type Filter keys in your Windows search bar
- Click on Ignore repeated keystrokes using FilterKeys
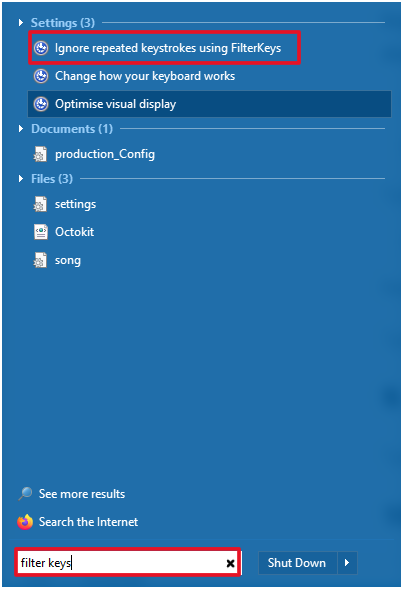
- Uncheck the box that says Turn on Filter Keys then click Apply
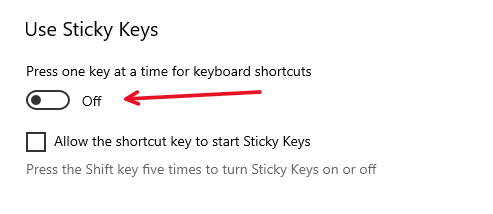
For sticky keys, follow the steps below.
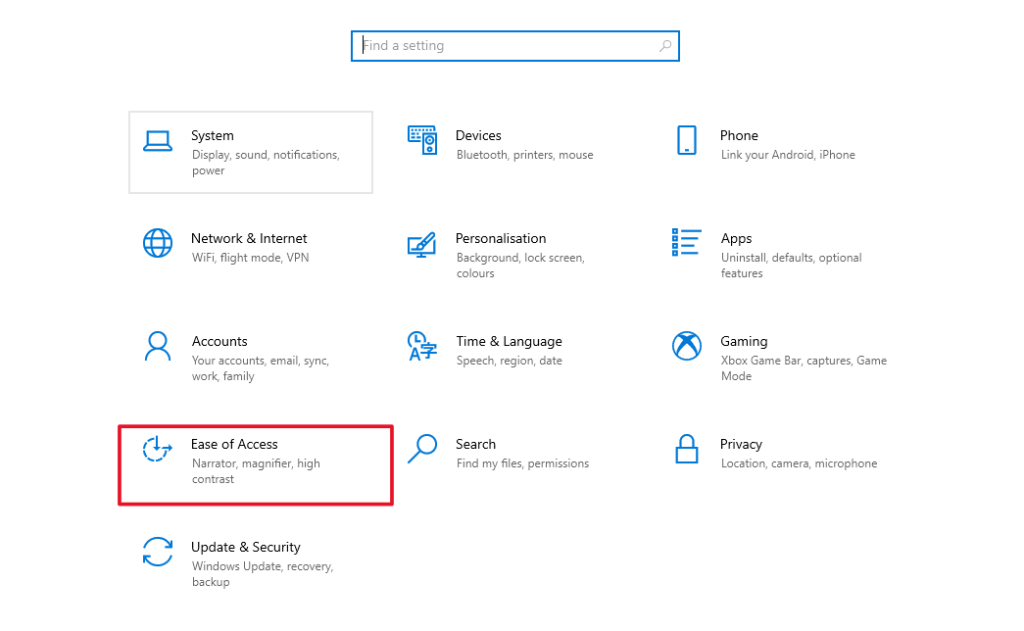
- Press the Windows key + I to access the settings menu
- Select Ease of Access
- On the left-hand side of the new menu, scroll down and click Keyboard
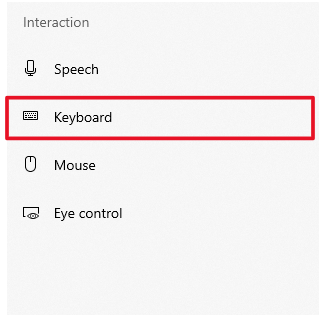
- Uncheck Use Sticky Keys